How Automated 3D Scanning Can Improve Your Manufacturing Process
Automated 3D scanning technology has revolutionized the manufacturing industry by providing better speed and accuracy during quality assurance and control (QA/QC) processes. By leveraging this technology, manufacturers can enjoy numerous benefits.
Benefits of Automated 3D Scanning in Manufacturing
Automated 3D scanning offers a wide range of benefits for manufacturing applications, including increased accuracy, greater precision, and fewer errors in production.
Using automated 3D scanning technology can also significantly reduce the cost of manual labor and materials purchases. They also eliminate the need for multiple manual measurements, which further improves process repeatability, efficiency, and cost savings.
In addition to cost savings, automating previously labor-intensive processes, such as quality assurance inspections, ultimately lead to quicker turnaround times across the board.
Lastly, automated 3D scanning technology helps reduce waste in manufacturing processes since these scanners capture every detail of an object or component, allowing for precise adjustments and the ability to catch defects earlier in a production line.
Manufacturers Can Increase 3D Scanning Benefits With Scan-to-Path™
By combining automated 3D scanning systems with Scan-to-Path™ software, manufacturers can significantly increase efficiency and save time, money, and resources.
Scan-to-Path™ is a proprietary software solution MAS offers to manufacturers in many industries which provides a new way to use automated measurement results in robotic manufacturing processes.
While typical 3D scanning technology allows robotic systems to quickly and accurately measure and inspect components, Scan-to-Path™ offers the same benefits with an additional layer of intelligence—adaptive pathing.
Scan-to-Path™ software collects 3D measurement data and uses that data to change a robot’s path, making metrology useful for manufacturing, not only end-of-line inspection. Here’s an example: In typical robotic assembly a robot would assemble the components and at the end of the line a human inspects it to ensure that everything was assembled correctly. Variation in the incoming components can cause the robot to make errors, but the robot has no way to adapt its work or to inspect the work after it is complete.
A Scan-to-Path™ system solves this problem. With Scan-to-Path™ the robotic system now has the ability to inspect the incoming parts during the assembly, adapt its paths to conform exactly to the incoming part shapes, and ensure that it is assembled correctly every time. It can even inspect the finished assembly at the end so that only good product continues down the line.
This software is especially useful for manufacturers who need to detect defects and immediately resolve them during every stage of production while maintaining high accuracy and precision in their operations.
3D Scanning Compared to Traditional Metrology

In recent years 3D scanning technology has challenged the supremacy of traditional measurement tools like hand tools, CMMs, and touch probes.
Using lasers, structured light, or photogrammetry, 3D scanning can capture both hard and soft surfaces, regardless of complexity, much faster than CMM, completing scans of complex surfaces in just a few seconds.
Using 3D scanners removes the need for hard tooling and fixtures, allowing any part or product to be measured quickly and accurately. As such, it can be used to capture both regular parts and atypical parts with equal ease.
The efficiency, agility, and cost savings that 3D scanners provide are some of the reasons why they are quickly becoming the preferred choice for many industries, and MAS is leading the way with products and software that make implementation of automated 3D scanning easier than ever
Automated 3D Scanning Versus Handheld 3D Scanning
When it comes to 3D scanning technology, there are two primary options: handheld 3D scanners and fully automated 3D scanning systems.
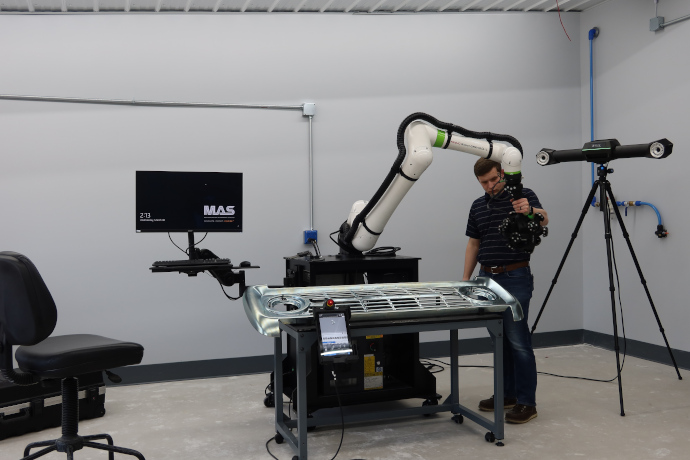
Handheld scanners give many of the benefits of non-contact 3D measurement and are a great step for many shops. But by automating the full system you gain many additional benefits including less hands-on inspection time, repeatable measurements regardless of operator, and the ability to fully integrate measurement into your manufacturing process.
Automated 3D scanning systems allow for precise measurement acquisition at high throughput rates.; they are also highly accurate and provide exceptional repeatability. If you want to grow your manufacturing plant into a factory of the future, automated 3D scanning and inspection is key.
Find Your Solution With Help From MAS
MAS is here to help you find solutions for your most challenging metrology needs. Our QC Plus™ smart measurement systems are designed with customization in mind so you can create a process that works for your business.If you’re interested in learning more about automated 3D scanning technology or our unique solutions, please contact us today to schedule a discovery meeting.
